
How Difficult is it To Remove Scratches From Headlights?
Restoring your scratched headlights to their original state can be daunting if you lack the required skillset.
However, getting rid of those blemishes from your car’s headlights is not too difficult.
Besides the skillset and required items mentioned below, you only need patience.
Specific methods might take a long time before the removal effects kick in. However, be aware that not all scratches are removable.
If you encounter profound and severe defects in your headlights, replacing them with a new set is a more reasonable solution than grinding your efforts and wasting time.
Consideration Aspects Before Removing Headlights Scratches
Before executing the removal process, it is essential to understand the 3 following aspects.
Aspect #1: Necessary Time
Depending on the chosen DIY method, you may need a few minutes to an hour for a fully restored set of headlights.
Aspect #2: Required Items
Fill up your gearbox with the following items.
- A bucket of soapy water
- Latex gloves
- Masking tape
- Microfiber cloths
- Sanding block
- 400, 600, 1200, and 2000 grit sandpaper
- Velcro plate
- 3′′ foam or wool polishing pad
Aspect #3: Approximate Cost
Most methods in this blog belong to the DIY category. Thus, besides the minor cost for required items, you are literally doing everything free of charge.
Different Methods of How To Remove Scratches From Headlights
In this section, let’s dig into the practical knowledge of effective scratch-removal methods for your headlights.
Method #1: Use Sandpaper and Buffing
Using sanding and buffing is probably the most basic and straightforward technique to address your issue.
Take advantage of this free answer if you don’t want to fork out any money. All you need is some sandpapers and polishing compounds.
Here is how you do it:
Step 1: Washing Your Headlights
- Before starting the restoration procedure, thoroughly clean your headlights with soapy water. Anything left on the surface may generate new scratches during the sanding and polishing procedure.
- There is no need to use a glass cleaner since most headlights are constructed of durable plastic.
- After that, rinse your lenses with a cotton towel to ensure they are entirely free of dirt.
- Don’t forget to clean your headlights’ surrounding areas.
- Once this area is dry, wrap it up with adhesive tape (instead of paper) to preserve the paint and the space between your headlights and the bodywork prior to the next step. Otherwise, you risk damaging your car’s paintwork.
Step 2: Sanding Your Headlights
- To start, it is advisable to prepare two or three different grit sandpapers, from coarse to fine.
- Soak the sandpapers in water. You should avoid using dry sandpapers at all costs since even fine-grit ones might result in additional scratches, causing you more harm than good.
- Then, begin by wet-sanding the scratches with 600-grit sandpaper and then advance to 1200-grit and 2000-grit. This practice helps make those scratches smooth but not flat, so it doesn’t appear like you simply painted over your lenses.
- If you have extremely hazy headlights, it is preferable to start with 400-grit sandpaper instead of 600-grit.
- The ideal sanding technique uses one sort of sandpaper vertically and the other horizontally. Avoid circular motions.
- Refrain from sanding with your bare hand. Also, avoid rushing the process by using a sander. Instead, use a sanding block.
- Always add water, as the friction from sanding generates a considerable amount of heat and can deform your headlights.
- Occasionally stop and dry your headlights to assess their condition. You may continue sanding the lenses until they feel smooth to the touch.
Step 3: Wiping Down Your Headlights
- After sanding, allow your vehicle headlights to dry for a few minutes.
- Clean your headlights gently with a microfiber cloth.
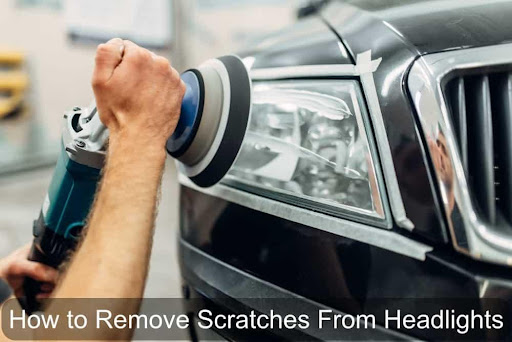
Step 4: Buffing Your Headlights
- Before completing your project, you will want to preserve the quality of your headlights for as long as possible. Buffing (or polishing) your headlight glass helps extend its life and prevent it from future harm.
- Apply a polishing compound to restore your headlight’s shine. This process takes time and requires patience to attain the ideal effect. If you finish polishing in a matter of minutes, your task is incomplete.
- Utilize Chemical Guys Repair and Polish for polishing. These products help make it difficult for the covers to deteriorate again.
- You may polish the plastic headlights with a 3′′ foam or wool polishing pad if you wish to do it yourself
- Make sure to apply the polish on the pad before actually polishing, as this equipment gets significantly hot when rotating at high speed. The generated heat can deform your headlights.
- Apply more polish and keep polishing until the headlights become clear.
- Finally, seal your polished headlight with a plastic treatment agent. This product is available at any specialized dealer in automotive accessories. Make sure to confirm your purchases are compatible with your headlights.
Method #2: Utilize Toothpaste and Baking Soda
Particular household objects are extremely effective against scratches on your car lenses. Toothpaste and baking soda are no exception! With a bit of elbow grease, this method can buff away minor scratches.
Follow this step-by-step guide to applying this technique:
Step 1: Preparing The Appropriate Equipment
- To remove scratches from your headlights, a good practice is to use “whitening” toothpaste. “Whitening” toothpaste is effective since it includes very fine, scarcely noticeable abrasives.
- Mix 5 teaspoons of baking soda and enough warm water in a dish to create a paste.
- Avoid using incorrect chemicals on your headlights, as they can quickly generate minute imperfections that attract dust and corrosive substances.
Step 2: Cleaning Your Headlights Thoroughly
- Similar to method #1, washing your headlights must be washed carefully before applying any cleaning technique.
Step 3: Applying The Paste and Toothpaste To Your Headlights
- After washing your headlights thoroughly, use a sponge to apply the paste to the car headlights.
- Use a dirt-free towel to polish your headlights in tiny circular movements.
- Let everything sit there for around 5 minutes.
- Complete the procedure by polishing the afflicted region with toothpaste on a towel and rinsing away the toothpaste residue. This procedure may be time-consuming when you are dealing with big areas.
Method #3: Rely on Headlight Restoration Kit
Relying on the headlight restoration kit is another simple solution to eradicate blemishes on your vehicle lenses.
Although this technique allows for less control than the two methods above, it is speedier and more environmentally friendly.
The headlight restoration kit’s process is similar to that of method #1.
This section will illustrate how you do it with the Turtle Wax kit. Let’s pull off the task by doing the following procedure:
Step 1: Getting Your Headlights Properly Cleaned
- As a rule of thumb, rinse soapy water over your headlights.
- Then, mask off the areas surrounding your car lenses (fenders, bumpers) and pop your hood if it meets the edges of your headlights.
Step 2: Installing Your Equipment
- Insert and tighten down the drill attachment on your hand drill.
- Attach the sanding pad to the velcro on the drill attachment with a firm press.
- Then, grab the clear spray lubricant and wet both the sanding pad and the headlights.
Step 3: Sanding Your Headlights Slowly
- Start sandling slowly, making sure you apply firm pressure to allow the sanding pad to remain fully in contact with the headlight lenses.
- Remember to spray lubricant mix and periodically wipe away residue on your headlights, keeping the work area free of too much build-up.
- Move-in back and forth motions across the lenses.
- Repeat lubricating, sanding, and reviewing between passes until you achieve a uniform finish on the headlights’ surface.
Step 4: Applying Turtle Wax on Your Headlights
- After the sanding process, apply Turtle Wax on your headlights.
- Work with a tiny area at a time and polish the entire headlights twice to render the optimum scratch removal effect.
- Wipe away all residue with a clean microfiber cloth, ensuring the compound is firmly polished into the headlight lenses.
Importance of Removing Scratches From Your Car Headlights
Remedies for removing scratches from headlights are essential as they help you avoid the abundant cost of replacing a new set.
Additionally, they effectively reintroduce the bright illumination you can only find on original headlights.
Getting rid of those blemishes from your headlights also safeguard you from on-the-road dangers.
Scratched headlights can block 90% of the emitted light, causing huge safety problems when driving at night or in the rain.
Plus, more extensive fractures and scratches might result in unwanted light dispersion, raising the danger of blinding other road users.
They may believe you have turned on your high beam while, in fact, you are dispersing your low beam incorrectly due to scratches.
Thus, your vehicle is no longer at risk by merely removing scratches.
Is it Worth Paying Extra Money For Professional Sandblasting?
You will get what you pay for. The principle applies to relying on professional sandblasting services to eradicate scratches from your headlights.
Using this service brings many benefits if you are willing to invest the money.
Firstly, you will solve your issue in the blink of an eye.
By that, I mean your headlights will become new and shiny again in the quickest time possible.
Secondly, the professional will ensure your headlights are scratch-free and well-polished with great appeal.
Lastly, sandblasting is less wasteful as the process uses mainly non-toxic and recyclable materials, such as glass beads.
People Also Search For
Congratulations on reaching this section. Here are some commonly asked questions to expand your knowledge on the topic.
Does Rubbing Compound Restore Headlights?
Yes, rubbing compounds can restore headlights. It may be more coarse than polishing compound, which is a gentler option you can use for your lenses.
What To Put on Headlights After Polishing?
After cleaning the lens, it is necessary to cover them with a clear coat for better protection.
A thin layer of carnauba wax is highly recommended. It applies well to headlamp lenses made of plastic or acrylic.
Does WD 40 Remove Scratches From Plastic Headlights?
Unfortunately, WD 40 is ineffective in removing scratches from plastic headlights. The product is used to lubricate and clean metal surfaces only.
Does Vaseline Remove Scratches From Plastic Headlights?
Yes, Vaseline is a flexible substance that can erase minor scratches effortlessly. However, be careful to apply it gently to the affected area.
Why Does Toothpaste Remove Scratches From Headlights?
Although labeled as non-abrasive, toothpaste still has a trace of abrasive material to effectively clean your teeth.
This abrasive component can buff away minor blemishes from headlights and smooth the surface quickly.
Final Words
Answering “how to remove scratches from headlights” reveals various remedies to fix your issue while successfully avoiding the high replacement cost.
All solutions are quick, economical, and so simple to follow.
I hope these solutions for removing scratches from headlights will save both time and money for those in need of assistance.
The result that these procedures bring about can surprise your family and friends.
Next time they come to your house, just tell them that you got brand new headlights as a joke! I bet most of them will fall for that fun trick!

Hello! My name is John Smith. I’m the creator of this website. Since childhood, I had a passion for cars and its mechanisms. So, I started working in the automotive industry when I just left school, and how I have over 10 years of experience in this industry. To make my experience alive through the content I started blogging through Lighting Sparkle. I hope that my experience through the content can help you a lot in making decisions and learning.