
If you need an installation guide on how to light up acrylic with LED, you are at the right place.
Acrylic is an excellent and flexible material that can be used for many interior decoration projects.
This material is popular because it supports quick and easy lighting features, making it possible for anyone to efficiently work with it.
The acrylic sheet can be customized in numerous ways to give you the results that you desire. It can be engraved, drilled, bent, and you can even cut it to meet your chosen design.
There is much you can achieve when you use an acrylic sheet for your interior decoration needs. This material comes in various sizes, colors, and thickness levels.
There are no limitations to what you can do with an acrylic sheet and the result you can achieve when you combine it with LED lighting.
As you read along, we will discuss the various techniques you can adopt to light up your acrylic using LED lights and the step-by-step DIY installation/setup process.
What is Acrylic Light?
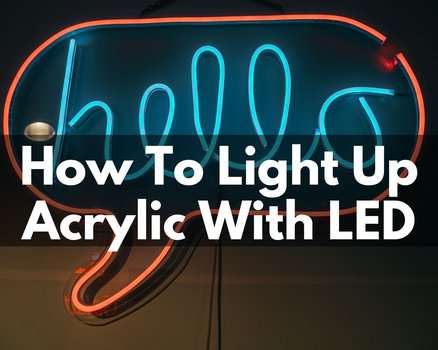
Acrylic light is the combination of acrylic sheet and LED lighting to make a particular design of your choice, most especially lettering, image, or logo, stand out from other materials around.
The logo, lettering, or other structures of your choice are engraved on the acrylic sheet.
LED lighting is then applied to illuminate and spread evenly across the acrylic, making the engraved design stand out or look catchy, especially in darker areas or at night.
How Does Acrylic Light Work?
The material, acrylic, is popular for its incredible light-handling qualities.
This material allows the free flow of light across its surface.
Your desired design or project is transferred to the acrylic sheet using an engraving tool.
You can reach out to individuals who offer this service and hire them to engrave your acrylic for an agreed price; if you do not have an engraving tool,
The engraved image or lettering forms a rough surface on the acrylic, creating an area where lighting can reflect off. The engraved design refracts the light, ensuring this particular area looks visible.
Ensure the engraving is done rightly and accurately. The depth must be equal to allow even reflection of light and prevent a bright spot from showing once the LED light is included.
You can then choose a lighting material according to your preference, budget, or material availability. For best performance, your lighting choice or selection must be flexible.
You must be able to switch it on/off at will.
Different Techniques To Light Up Acrylic With LED
This section will look at the various ways you can light up your acrylic once you have successfully engraved your designed sign or image on it.
01. Using LED Strip
This lighting material is readily available on the market. It is popularly packaged in a flexible roll. When shopping for an LED strip, make sure you choose one of the designs with exciting features that allow easy and flexible operation. One notable design you can get is the RGB LED strip kit.
The LED strip sticks to the base of the frame holding the acrylic sign in place without the need for adhesive. All you need to do is take off the protective cover, attach the strip to the appropriate position, and then hold it down for a few seconds to stick firmly.
Also, it comes with remote control for flexible and easy use. This allows you to switch on/off the light without necessarily disconnecting the adapter or getting close to where the acrylic is placed/positioned.
You can get this kit on popular online marketplace/stores like Amazon, and it is very affordable.
Since the LED strip comes in a roll, you will need to cut it to a specific size, according to the length of the frame where the acrylic will be placed. Make sure appropriate measurement is done to know the exact length you need.
Do not cut the strip abruptly. Ensure you follow the manufacturer’s direction to avoid cutting it at the wrong spot.
Once the LED strip attachment is complete, you can place the acrylic sign in/on the frame. Connect the adapter and remote receiver appropriately, and turn on the LED light using the remote control.
If you follow the steps as instructed by the manufacturer, the LED light will come up, illuminating your acrylic sign.
02. Using LED Bulb
This time, an LED bulb is used instead of the LED strip. You need to decide on the color of the LED bulb. You desire and then come up with the list of components you need to successfully power the LED bulb to properly light your acrylic design.
As discussed earlier in the first technique, you will need a frame where the acrylic will be placed or held in position. The stand also houses the lighting components.
While constructing/building your frame, make sure you leave a space where the on/off switch and the dimmer control/adjuster will be positioned for convenient operation.
Also, ensure that the battery is housed under the frame for easy replacement if it goes bad.
You can get the necessary tools and components on Amazon and electrical stores around you at affordable prices.
These components are an LED bulb, resistor battery, dimmer, wires, power switch, and screws to hold some of these components together.
Once you have gotten all the needed electrical components, assemble or solder them together. Upon completion, check if the circuit is in good working condition and if the LED bulb is dimmable.
After the electronic components have been tested and guaranteed to perform excellently well, you can then transfer/install them permanently into the frame.
Put the electronic components in place, cover the frame, leaving the opening or spot where the acrylic sign will be mounted.
Turn on the LED light bulb and insert the acrylic in the prepared position above the bulb to illuminate and give the sign/design an attractive and eye-catching appearance.
Depending on the level of brightness you desire, you can use the dim switch/control to adjust the brightness of the light that illuminates the acrylic.
03. Where To Buy
You can get the Acrylic sheet and other components needed to successfully light up this material on Amazon and local stores around you.
04. Cost
On average, acrylic sheets costs between $5 and $175 per square foot. This material’s price depends on the level of thickness, size, and the type of acrylic sheet that you wish to buy for your project.
How To Light Up Acrylic With LED (Step-By-Step Process)
Tools
- Acrylic sheet
- Engraving tool (CNC machine or Dremel)
- Cutting tool (simple hacksaw, laser cutter, or band saw)
- LED strip
- Frame to house the lighting components and the acrylic sign
- Electronic components such as LED bulb, dimmer, battery, wire, resistor, and control knobs
- 3D printer
DIY Steps
a) Engrave/Cut Your Acrylic Sheet
To begin with, you need to cut the acrylic sheet to a specific size and engrave your desired sign, image, or lettering on it. The engraved sign is the area of attraction when the LED light is turned on.
While preparing the acrylic sheet (cutting and engraving), ensure you take your time with the process to avoid scratches or dents. If the cutting and engraving are not neatly done, the imperfection will show up when you finally illuminate the acrylic.
One of the simplest ways to cut your acrylic sheet is to use a laser cutter. More affordable options include the use of a band saw or a simple hacksaw.
To engrave your desired image and sign on the acrylic surface, you can use a CNC machine. If you don’t have access to one, a rotary tool is an option you can consider.
Using the rotary tool requires a lot of patience, and you need to be brave. Your hand must not be shaky and must be consistent throughout the process.
Alternatively, you can hire the service of a skilled engraver to cut the acrylic to your desired size and also get your preferred design or sign inscribed on the surface.
Make sure the edges you intend to place directly above the LED light are smooth and clear for the best outcome. This allows light to shine through the acrylic nicely.
b) Pick Your Desired Lighting Material or Technique
As we have discussed earlier in this guide, there are two major methods or techniques that you can use when it comes to lighting up your acrylic with LED. Choose an option that looks appealing to you and buy the necessary kit and components needed to put them together.
c) Design a Frame To House The Lighting Components and Acrylic Sign
You can build a frame using wood or plastic. In most cases, people print out the plastic materials or components they need for this project using the 3D print.
Whichever option you choose, make sure the frame is solidly built and connected together. Also, ensure there is enough space inside the frame (at the base) to easily house all the lighting components or fixtures needed for this project.
Measure the length and width of the acrylic sign before you build the frame. This ensures the mounting space can easily and securely hold the acrylic in place without the need for glue or adhesive.
d) Insert The LED Lighting Material/Components
Ifyou are using the LED strip, make sure you choose a design that allows flexible control and operation. We have discussed this earlier in this guide. Ensure you follow the manufacturer’s directions about prepping and installation. Place the LED strip at the base of the frame. Ensure it sticks firmly and securely.
Ensure you make the necessary connection for the LED light bulb and confirm all features and functionalities are working as expected before you finally insert them inside the frame.
e) Insert The Acrylic Design/Sign Into The Created Space in/on The Frame
Once you have confirmed that the LED lighting is in excellent working condition, the next thing is to insert the acrylic sign in the already created compartment in/on the frame.
At this stage, the acrylic should comfortably and easily fit into the frame, provided you take the proper measurement while building the frame. Do not glue the acrylic to the frame for any reason.
This way, you can easily remove the acrylic later in the future and replace it with another design of similar size without needing another frame.
Plug in the LED light power adapter to the electrical socket and turn on the switch to see the final outcome of your project.
The LED lighting will illuminate the acrylic, making the design or image engraved on the surface glow, creating an eye-catching appearance. https://youtu.be/QDeIi666xL0
Frequently Asked Questions
How Do I Select The Best Acrylic Sheet?
When considering the type of acrylic sheet to buy, several factors come into consideration. First, you must decide on the type of light you intend to pair with the acrylic sheet and the brightness level you seek.
Once you have considered these factors and identified what you need, you can choose an acrylic sheet with the right thickness and size to support your project.
How can I choose the perfect size of acrylic for my project?
The easiest way to find out or choose the right size of material you need for your project is measurement. Know the size of your project (decide on the length and width) to determine the thickness and size of the acrylic sheet you need to bring it to life
How Do I Remove deep scratches from my acrylic sheet?
You can remove scratches that may affect the performance of the acrylic sheet once illuminated using sandpaper.
What Material is an Acrylic Sheet Made From?
Although acrylic sheet has the feel and appearance of glass, it is indeed made of clear plastic. It is also important to point out that the acrylic sheet is built as a superior material to glass.
What is The Recommended Cleaning Technique For Acrylic?
Avoid spray or cleaning materials that are specifically designed for glass. They often have ammonia as part of the ingredients or composition, which can scratch the acrylic surface when applied.
Instead, go for products that are designed for acrylic sheets for the best outcomes.
Finally
So far, we have discussed how to light up acrylic with LED using some of the major techniques available. While choosing the method to adopt, ensure you consider the one that is easily accessible to you.
We hope you will enjoy making your acrylic LED project on your own without any issues and have fun while at it.

Hello! My name is John Smith. I’m the creator of this website. Since childhood, I had a passion for cars and its mechanisms. So, I started working in the automotive industry when I just left school, and how I have over 10 years of experience in this industry. To make my experience alive through the content I started blogging through Lighting Sparkle. I hope that my experience through the content can help you a lot in making decisions and learning.